We’ve all had those days when only a warm, hearty meal will do. It’s 6 p.m., the kids are hungry, and you need something easy but satisfying. That’s where Crack Chicken Casserole comes in—creamy, cheesy, and packed with flavor that feels like a hug on a plate. It’s a weeknight lifesaver that’s won hearts in kitchens everywhere.
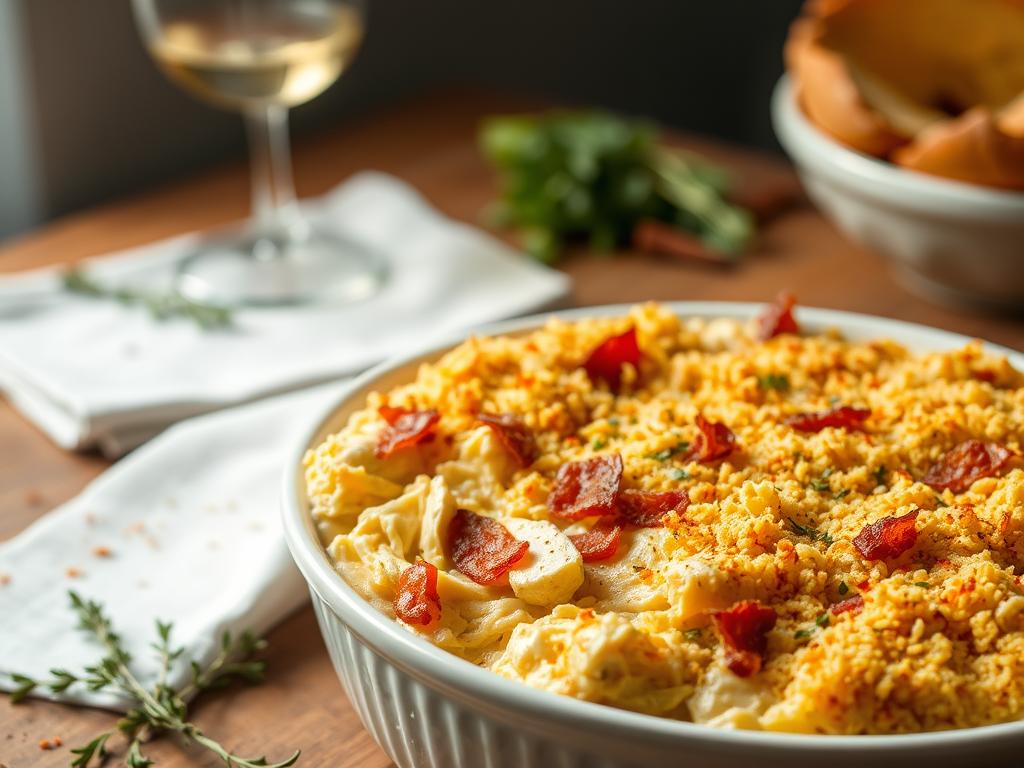
This family-friendly meal transforms basic pantry staples into something extraordinary. Imagine tender shredded poultry, crispy bacon, and pasta swimming in a rich cream cheese-ranch sauce, all crowned with melted cheese. Best part? It’s ready in just 30 minutes, proving comfort food doesn’t need hours of prep. Whether you’re new to cooking or a seasoned pro, you’ll appreciate how effortlessly it comes together.
What makes this dish special isn’t just the taste—it’s the way it gathers people around the table. The aroma alone sparks excitement, while every bite delivers that “I need another scoop” magic. It’s the kind of meal that turns ordinary weeknights into moments worth savoring.
Key Takeaways
- Perfect for busy schedules with a 30-minute cook time
- Combines creamy sauces, melted cheese, and crispy bacon
- Uses easy-to-find ingredients for stress-free prep
- Appeals to both kids and adults for family dinners
- Ideal for meal prepping or potluck gatherings
Introduction to a Family Favorite
There’s magic in recipes that bring everyone to the table without fuss. This creamy bake has earned its spot as a weeknight lifesaver, blending familiar flavors into one irresistible dish. Let’s explore why it’s become a go-to for households across the country.
Overview of the Recipe
Imagine tender pasta tossed with shredded poultry, crispy bacon bits, and a velvety sauce made from cream cheese, ranch seasoning, and sour cream. Topped with melted cheddar, it’s baked until golden—a texture party in every bite. What makes it shine? You likely have most ingredients in your fridge right now.
Why It’s Perfect for Weeknights
We call this our 30-minute wonder. From preheating the oven to serving, you’ll spend less time cooking than waiting for delivery. Rotisserie chicken shortcuts cut prep work, while the one-dish approach means fewer dishes. Even better? It reheats beautifully for tomorrow’s lunch.
Busy parents love how it handles picky eaters. The creamy base appeals to kids, while adults savor the smoky bacon and zesty ranch notes. One reader shared: “My teens actually ask for seconds—that’s when I knew this recipe was special.”
Essential Ingredients for a Delicious Chicken Casserole
Great meals begin with quality components. Let’s break down what makes this dish unforgettable. Every element plays a role in creating that creamy, savory harmony your family will request again and again.
Key Proteins and Dairy Components
Start with 2-3 pounds of boneless chicken breast for lean texture, or grab a rotisserie bird to save time. Crispy bacon adds smoky depth—we recommend baking 4-6 slices until crunchy. The dairy trio works magic:
| Ingredient | Purpose | Substitutes |
|---|---|---|
| Cream cheese | Rich, velvety base | Greek yogurt (reduce by 25%) |
| Sour cream | Tangy balance | Plain yogurt |
| Ranch seasoning | Zesty flavor boost | Homemade herb blend |
| Cheddar & mozzarella | Melty perfection | Monterey Jack, Colby |
Fresh and Pantry Staples
Use al dente pasta shells or bowties—they hold sauce beautifully. That ranch seasoning packet? It’s the flavor MVP. Want to sneak in veggies? Stir in sautéed mushrooms or frozen peas before baking.
We love how flexible this recipe is. Swap penne for gluten-free noodles, or add broccoli for crunch. One reader told us: “I used rotini and spinach—my kids didn’t notice the greens!”
How to Prepare Your Crack Chicken Casserole

Getting your kitchen ready is half the battle won. We’ll walk you through each step to ensure your dish turns out creamy and golden every time. Let’s start with the foundation—proper oven setup and sauce prep.
Preheating and Prepping the Oven-Safe Dish
First things first: Fire up your oven to 375°F. This temperature works like magic—it cooks ingredients evenly while creating that irresistible crispy-cheesy crust. Grab a 9×13 inch baking dish or oven-safe skillet. A quick spritz of non-stick spray prevents messy cleanup later.
Mixing the Creamy Ranch Sauce
Now for the star player—the sauce. Beat softened cream cheese in a large bowl with a hand mixer until fluffy. Add sour cream, ranch seasoning, and a pinch of black pepper. “This step makes or breaks the texture,” shares home cook Marissa from Ohio. “Take an extra minute here—it’s worth it!”
Want your sauce thinner? Stir in ¼ cup chicken broth. Too thick? A splash of milk does the trick. Taste as you go—this is your chance to tweak flavors. Pour this velvety mixture over your cooked pasta and protein, ensuring every bite gets coated.
Pro tip: Use the same bowl for mixing sauce and combining ingredients. Fewer dishes mean more time enjoying that golden masterpiece!
Step-by-Step Cooking Process

Let’s transform those ingredients into a golden masterpiece together. Our easy instructions guide you through each stage, from layering flavors to achieving that restaurant-quality finish right in your home oven.
Building Flavor Through Baking
Spread your seasoned poultry mixture into the greased dish. Slide it into a 375°F oven for 20 minutes—this lets the cream cheese blend with the ranch spices while the protein cooks perfectly. Use this time to boil your pasta until al dente, then drain it thoroughly.
Once the timer dings, carefully remove the dish. Gently stir in noodles and crispy bacon bits. Sprinkle half your shredded cheese blend into the mix, stirring until it melts into the sauce. Top with remaining cheese for that “wow factor” layer everyone loves.
| Step | Time | Key Action |
|---|---|---|
| Initial Bake | 20 minutes | Cook poultry base |
| Mix-In Phase | 5 minutes | Combine pasta & bacon |
| Cheese Layering | 2 minutes | Stir half, top rest |
Finishing With Precision Broiling
Return the dish to the oven for 5-7 minutes until bubbly. Now comes the magic touch—switch to broil on high. Watch closely for 2-3 minutes as the cheese transforms into a golden crown. Pro tip: Keep the oven door slightly ajar to monitor color changes.
Let it rest 5 minutes before serving. This brief pause lets the sauce thicken slightly, making portioning cleaner. “That first cheesy bite makes every second worth it!” shares home cook Danielle from Texas.
Tips and Tricks for the Perfect Casserole

Every great dish has its secrets, and we’re sharing ours to help you master this crowd-pleaser. Let’s explore techniques that enhance texture and taste while keeping prep stress-free.
Searing for Maximum Flavor
Want restaurant-quality depth? Sear your poultry first. Heat olive oil in a skillet over medium-high, then cook breasts 3-4 minutes per side until golden. This caramelized crust locks in juices while adding rich, savory notes. “That sizzle sound? That’s flavor being born,” says home chef Miguel from Arizona.
Full-fat dairy makes all the difference here. Cream cheese and sour cream create a velvety sauce that holds up during baking. Low-fat versions might separate—trust us, this is worth the indulgence.
Customizing Your Seasoning Mix
Take control of your flavors with homemade ranch seasoning. Combine 1 tbsp each dried dill, parsley, and onion powder with 1 tsp garlic powder. Adjust ratios to taste—add smoked paprika for warmth or lemon zest for brightness.
Let your creation rest 5-10 minutes after baking. This helps the cheese set for cleaner slices. Always check internal temps—165°F ensures safety without drying out the meat. For spice lovers, stir red pepper flakes into the sauce mix before baking.
Remember: Great cooking is about making it yours. Swap ingredients freely, but master these fundamentals first. Your family will taste the care in every bite!
Easy Variations to Enhance Your Dish

The beauty of this recipe lies in its adaptability. Whether you’re swapping ingredients for dietary needs or simply using what’s in your pantry, we’ve got stress-free tweaks to keep things exciting. Let’s explore how to make this meal uniquely yours while keeping that crowd-pleasing magic intact.
Alternate Ingredients and Substitutions
Rotisserie poultry is our go-to shortcut—shred 3 cups for instant prep savings. Prefer plant-based? Try seasoned chickpeas or tofu crumbles. Pastas like bowties or penne add playful texture, while cheeses like Monterey Jack create new flavor layers. Sneak in veggies for color and crunch without compromising comfort.
| Original | Smart Swap | Why It Works |
|---|---|---|
| Sour cream | Greek yogurt | Boosts protein, lighter texture |
| Cheddar | Feta + mozzarella | Tangy meets creamy |
| Fresh poultry | Rotisserie meat | Saves 15+ minutes |
| Bacon bits | Sautéed mushrooms | Adds earthy depth |
For hands-off cooking, try the slow cooker method. Combine everything except the final cheese topping, cook on low 4-6 hours, then melt your chosen dairy on top. “It’s like coming home to a ready-made hug,” shares meal-prep enthusiast Clara from Colorado.
Remember: Great recipes evolve with your tastes. Mix, match, and make it yours—we promise the results will still earn those empty plates and satisfied smiles!
Serving Suggestions and Storage Ideas
Every great meal deserves the perfect finishing touches. Let’s explore how to turn your creamy creation into a complete dining experience while keeping leftovers tasting fresh.
Pairing with Sides and Garnishes
Balance richness with bright flavors. Serve slices with garlic breadsticks for dipping or a crisp green salad. Roasted broccoli adds earthy notes, while pickled veggies cut through the creaminess beautifully.
Fresh herbs make everything better! Sprinkle chopped chives or dill over portions. For crunch, top with fried onions or crushed crackers right before serving. One reader raves: “A squeeze of lemon takes it to restaurant-level deliciousness!”
Refrigerating and Freezing
Cool completely before storing. Keep portions in airtight containers for up to 4 days. Freeze individual servings in foil pans—they reheat perfectly in 350°F ovens. Pro tip: Add a splash of broth when reheating to revive that velvety texture.
Indulge in Comfort: Discover the Irresistible Delight of Funeral Potatoes!
Are you ready to elevate your next gathering with a dish that combines creamy goodness and cheesy perfection? Funeral Potatoes are not just a meal; they’re a heartwarming experience that will leave your guests raving and asking for seconds! This beloved comfort food is perfect for any occasion, from family dinners to potlucks, and it’s easier to make than you think!
Don’t miss out on the chance to impress your friends and family with this unforgettable recipe. Dive into my blog now to uncover the secrets behind this creamy, cheesy potato dish that everyone loves!