Remember those nights when takeout menus feel overwhelming, but cooking a full meal seems impossible? We’ve been there too. That’s why we fell in love with creating our own thin, chewy masterpiece (Flatbread Pizza)– a dish that bridges the gap between effort and reward like nothing else. It’s become our secret weapon for turning chaotic evenings into moments of connection.
What makes this so special? Imagine golden edges with just the right crunch, paired with your favorite fresh ingredients. Our go-to dough comes together in minutes, forgiving enough for first-timers yet impressive for seasoned cooks. You’ll be amazed how simple it is to craft something that feels straight from a artisan kitchen.
We designed this method specifically for real life – no fancy equipment or hours of waiting. The magic happens in about 60 minutes from mixing bowl to table. Whether you’re feeding two hungry adults or creating a build-your-own spread for four, this recipe adapts to your needs while letting creativity shine.
Key Takeaways
- Create restaurant-quality meals in 1 hour with minimal ingredients
- Perfect for 2-4 people with flexible serving options
- Beginner-friendly dough that’s easier to handle than traditional versions
- Full control over ingredients for healthier customization
- Works beautifully with both simple and gourmet toppings
Ingredients and Essential Tools for Your Flatbread Pizza
Ever stared at your pantry wondering what magic you can whip up with just a few basics? This recipe thrives on simplicity, using ingredients you likely already own. Let’s transform everyday items into something extraordinary.
Key Ingredients: Yeast, Flour, Olive Oil, and More
Our dough starts with just 1 teaspoon of yeast – instant or active-dry both work beautifully. Pair it with all-purpose or bread flour (our secret for chewiness!) and warm water heated to 100-110°F. No thermometer? Test it like we do: it should feel like a cozy bath for your wrist.
| Flour Type | Texture | Best For |
|---|---|---|
| All-Purpose | Light & Crispy | Quick Meals |
| Bread Flour | Chewy & Sturdy | Heartier Crusts |
Olive oil plays two roles here – enriching the dough and creating a moisture barrier for toppings. Don’t skip the pinch of sugar (it feeds the yeast) or salt (for flavor depth). Feeling adventurous? Add garlic powder or Italian seasoning to the mix!
Must-Have Kitchen Tools and Equipment
You’ll need basic gear: a large bowl, measuring spoons, and parchment-lined baking sheet. A stand mixer saves time, but hand-kneading works too – we’ve tested both methods extensively. Keep a kitchen towel nearby for dough resting, and remember: a rolling pin helps, but hand-stretching creates that artisanal charm we all crave.
Understanding Yeast, Flour, and Dough Basics

Have you ever wondered how flour and water transform into something airy and delicious? It’s all thanks to yeast – nature’s tiny miracle workers. We’ll show you how these living organisms create magic in your mixing bowl, turning simple ingredients into a textural masterpiece.
Active dry and instant yeast both work here – no special adjustments needed. Proof your yeast in warm water (100-110°F) until it becomes frothy like a latte. This foam means your dough will rise perfectly. If it doesn’t bubble? Your water might be too hot or the yeast expired.
| Yeast Type | Activation Time | Best For |
|---|---|---|
| Active Dry | 5-10 minutes | Traditionalists |
| Instant | No wait needed | Quick bakes |
Our recipe uses a lean dough – just flour, water, yeast, and salt. No milk or butter means you get that perfect crisp-chewy balance. The secret? Gluten development. When you knead, proteins in flour form elastic strands that trap gas bubbles from the yeast.
Struggling with sticky hands? Add a tablespoon of flour while kneading. Dough too dry? Mist it with water. Remember – this version needs less rising time than traditional recipes. That’s why we love it for quick, satisfying baking sessions!
Preparing and Kneading Your Flatbread Dough
Ever felt the satisfying squish of fresh dough between your fingers? This hands-on phase transforms simple ingredients into your canvas. Let’s awaken those yeast colonies and build the foundation for your culinary creation.
Mixing and Activating the Yeast
Combine warm water (100-110°F), sugar, and yeast in your mixing bowl. Wait 5-10 minutes until it resembles a foamy cappuccino foam. No bubbles? Your yeast might need replacing or the water temperature needs adjusting.
Add flour, olive oil, and salt. Mix until the dough pulls away from the bowl sides. Perfect consistency feels like a baby’s earlobe – soft but not sticky. Too tacky? Dust with 1 tbsp flour. Too dry? Mist with water.
| Method | Time | Texture Result |
|---|---|---|
| Hand Kneading | 8 minutes | Artisan chew |
| Mixer Kneading | 6 minutes | Consistent elasticity |
Kneading Techniques and the Windowpane Test
Push-fold-turn-repeat! This rhythmic motion develops gluten strands. Set a timer – 6 minutes for machines, 8 by hand. Your dough will transform from shaggy to smooth like magic.
Perform the windowpane test: stretch a walnut-sized piece thin enough to see light through. If it tears immediately, knead 2 more minutes. Perfect dough springs back slowly when poked – like memory foam!
We’ve found this process therapeutic. As you work the dough, imagine crafting edible art. That slight stickiness? It’ll disappear during resting. Trust the process – your patience gets rewarded with that perfect chew.
Step-by-Step Assembly of Your Flatbread Pizza

Ready to turn that smooth ball of dough into your edible masterpiece? This stage is where the magic becomes visible. We’ll guide you through transforming risen dough into golden, crispy bases ready for toppings.
Shaping the Dough and Creating the Base
After 45 minutes, your dough will feel pillowy-soft. Gently press your fist into the center – this releases air bubbles for even baking. Divide it into two equal portions using a bench scraper or sharp knife.
Shape each piece by pushing outward from the center with your palms. Rotate as you go to maintain even thickness. Aim for ¼-inch – thin enough to crisp up, thick enough to hold toppings.
| Shaping Method | Time | Texture |
|---|---|---|
| Hand Stretching | 2 minutes | Rustic Charm |
| Rolling Pin | 1 minute | Uniform Base |
Applying Olive Oil and Pre-bake Preparations
Dimple the surface with fork tines or fingertips – this creates tiny oil reservoirs. Brush generously with olive oil, reaching every edge. The oil barrier prevents sogginess while adding rich flavor.
Preheat your oven to 475°F while shaping. Use parchment paper for easy transfer – slide it onto the hot sheet with a quick wrist flick. This high heat mimics professional ovens, giving that perfect crunch.
See how the edges bubble slightly before adding toppings? That’s your cue everything’s working perfectly. Now comes the fun part – decorating your edible canvas!
Creative Flatbread Pizza Toppings and Variations

Flavor possibilities become endless when you move beyond basic toppings. We’ve crafted combinations that elevate your meal while keeping prep simple and fun. Let’s explore fresh takes on classics and unexpected pairings that’ll make your taste buds sing.
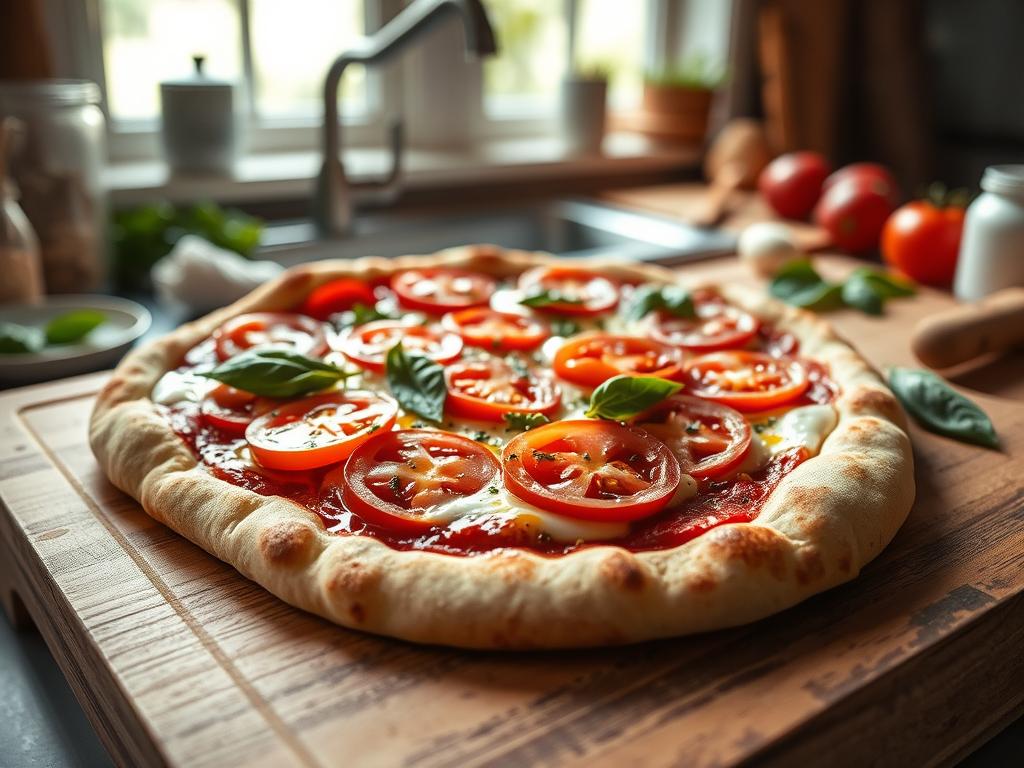
Classic Margherita and Tomato-Basil Combinations
Nothing beats the timeless trio of fresh basil, juicy tomatoes, and creamy mozzarella. Layer thin cheese slices over your base, then add tomato rounds and a generous sprinkle of torn basil leaves. Finish with parmesan shavings – the salty kick ties everything together beautifully.
Pesto, Goat Cheese, and Gourmet Additions
Swap traditional sauce for vibrant basil pesto. Spread it thick, then crumble tangy goat cheese alongside mozzarella pearls. Top with roasted cherry tomatoes and a drizzle of honey. The sweet-savory balance here? Pure magic.
- Apple & goat cheese: Thinly slice crisp apples, pair with caramelized onions
- Sausage & pesto: Brown Italian sausage first, then scatter with pine nuts
- Mediterranean: Artichokes, kalamatas, and feta with lemon zest
Remember: Less is more. Keep toppings under ½ cup total to maintain that perfect crispness. Pre-cook meats and tougher veggies – they’ll finish cooking in the oven without releasing excess moisture.
We love how these ideas spark kitchen creativity. Swap ingredients based on seasons or pantry finds. Your masterpiece awaits!
Secrets to Achieving a Perfectly Thin and Crispy Crust

That satisfying crunch when you bite into your creation? It all comes down to science we can master together. Our tested method balances intense heat with precise thickness for results that rival your favorite trattoria.
Preheat your oven to 475°F – this temperature creates instant surface bubbles in the dough. These micro-pockets become crispy landmarks while keeping toppings juicy. We’ve found 12-15 minutes is the sweet spot, but watch for golden edges peeking from under your cheese.
Your ¼-inch thick base works like armor here. Thin enough to crisp fully, yet sturdy enough to support ingredients without sagging. Listen closely around minute 10 – a soft crackling sound means magic’s happening!
Three doneness clues we swear by:
- Edges turn honey-gold
- Bottom sounds hollow when tapped
- Cheese bubbles but doesn’t brown
Rest your masterpiece 2 minutes before slicing. This lets steam escape, preventing sogginess. Now grab that cutter – your crispy-chewy triumph awaits!
Mastering flatbread pizza: Recipe & Techniques
There’s something magical about pulling a golden-edged creation from your oven. Our complete recipe gives you the flexible foundation to make flatbread pizza your weekly hero. Let’s recap the essentials for success.
Combine 1 teaspoon yeast with warm water and sugar. Mix in 2 cups flour, 2 tablespoons olive oil, and salt. Knead until elastic – about 8 minutes by hand. Rest 45 minutes while preheating your oven to 475°F.
Divide dough into two portions. Stretch to ¼-inch thickness on parchment paper. Brush generously with oil before adding toppings. Bake 12-15 minutes until edges sing with crunch.
Remember: The oven’s heat transforms simple ingredients into artisanal quality. We love doubling the batch – freeze extra dough balls for spontaneous meals. Share your favorite combinations using #OurKitchenCreations!
🌶️ Transform Your Dinner Tonight with Taco Stuffed Peppers! 🌶️
Looking for a delicious, crowd-pleasing meal that’s as fun to make as it is to eat? Dive into our mouth-watering Taco Stuffed Peppers recipe that will have your family and friends raving! Packed with bold flavors, fresh ingredients, and easy-to-follow steps, this dish is perfect for any occasion—whether it’s a cozy weeknight dinner or a lively weekend gathering.
Don’t miss out on the chance to elevate your cooking game and impress your guests with this vibrant and satisfying meal. Click the link below to discover the full recipe and start cooking up some taco magic today! Your taste buds will thank you!