Remember that moment when you first bit into a perfectly crispy potato nugget at a backyard BBQ? That golden crunch and soft center? That’s the magic of Loaded Tater Tots. Today, we’re bringing that same irresistible bite to your kitchen—only now, it’s topped with melty cheese, smoky bacon, and all the good stuff that turns simple tots into something unforgettable.
We’ve all had those nights where comfort food feels essential. Maybe it’s game day with friends or a cozy family movie marathon. That’s when this crowd-pleasing appetizer shines brightest. What starts as frozen potato gems transforms into a shareable masterpiece through simple yet brilliant upgrades.
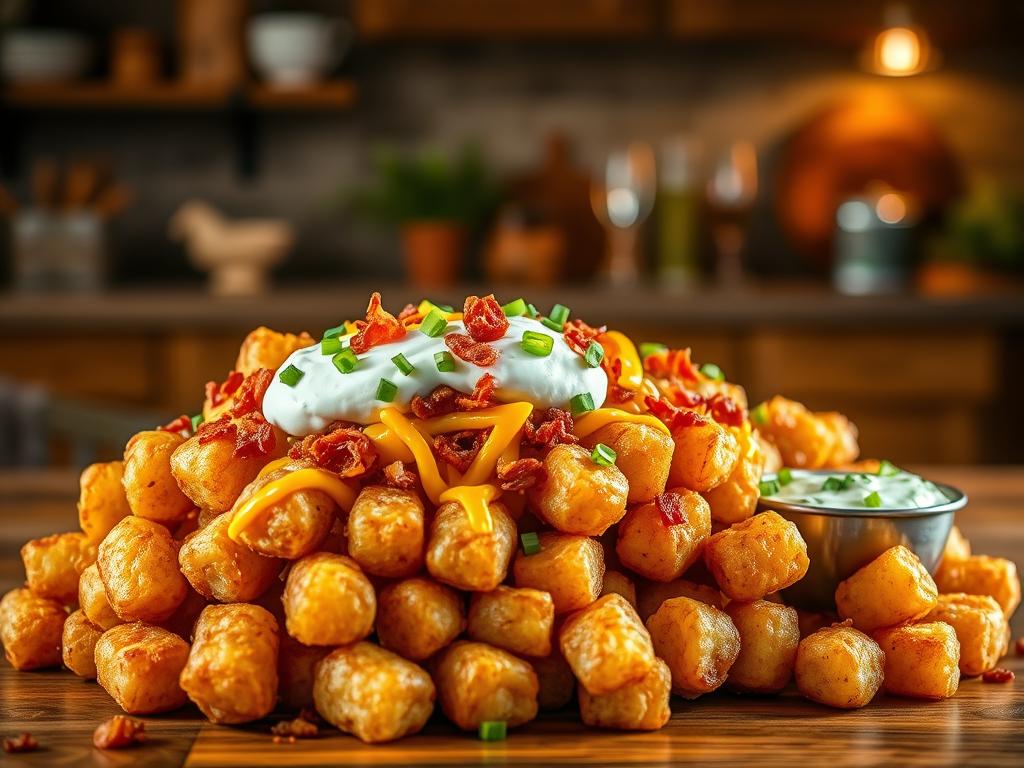
The secret lies in texture play. Imagine: crispy exteriors meeting melted cheese, savory beef, and cool dollops of sour cream. Restaurants from sports bars to pizza chains have embraced this dish for good reason – it’s universally irresistible. And guess what? Your version can taste even better than takeout.
Key Takeaways
- Transform basic frozen potatoes into gourmet snacks with creative toppings
- Master the ideal crispy-on-outside, fluffy-on-inside texture
- Discover why this dish rivals nachos in popularity at gatherings
- Learn balancing techniques for perfect flavor combinations
- Create shareable meals that bring people together effortlessly
Whether you’re feeding hungry teens or impressing foodie friends, this recipe adapts to any occasion. Let’s explore how to turn simple ingredients into memorable food moments – no chef skills required. Your journey to tot perfection starts right here.
Introduction to Loaded Tater Tots
What began as a humble cafeteria staple now rules game-day spreads and family dinners alike. These crispy potato bites evolved from school lunch trays to gourmet status through one brilliant idea: why not pile on the toppings? Let’s explore why this freezer-section hero became America’s favorite shareable snack.
What Makes Them a Crowd-Pleaser
Perfect finger food needs three things: crunch, flavor, and shareability. Our favorite potato gems check all boxes. Their bite-sized shape means no messy utensils, while the crispy shell holds up against zesty sauces and melted cheese. Whether you’re hosting teens or foodies, everyone builds their perfect bite.
A Brief Look at the Recipe’s Origins
Creative chefs first upgraded frozen tots in sports bars during the 2000s, dubbing them “totchos.” The concept exploded because it solved two problems: hungry crowds wanted hearty snacks, and kitchens needed quick, cost-effective solutions. Today’s versions honor that spirit – easy to make, impossible to resist.
| Feature | Traditional Nachos | Loaded Potato Bites |
|---|---|---|
| Base Texture | Crunchy chips | Crispy outside, fluffy inside |
| Topping Capacity | Limited by flat surfaces | Holds toppings in crevices |
| Customization | Layered toppings | Individualized bites |
| Reheating Quality | Soggy quickly | Maintains crispiness |
This table shows why upgraded potato bites often steal nachos’ spotlight. Their nooks cradle toppings better than flat chips, while the potato base stays satisfyingly crisp. Next time you plan a gathering, watch how quickly these disappear from the platter!
Essential Ingredients and Toppings

Every great dish begins with quality components that work in harmony. For our star appetizer, we’re building layers of texture and flavor from freezer staples to fresh garnishes. Let’s explore how each element contributes to that unforgettable bite.
Foundation First: Frozen Potato Magic
Start with a 32-ounce bag of frozen spud gems – they’re the canvas for your creation. Brands like Ore-Ida deliver consistent crunch, but any quality variety works. Why frozen? They retain moisture better than homemade versions, ensuring that golden exterior and fluffy interior we all crave.
The Melty, Crunchy, Fresh Trio
Colby Jack cheese reigns supreme here, melting into creamy pockets between crispy potato bites. Prefer sharper flavors? Try aged cheddar or pepper jack. For bacon, skip the jarred bits – real thick-cut strips fried until crackling add smoky depth you can’t fake.
Balance richness with bright toppings: diced jalapeños cut through cheese, while cool guacamole tempers spicy taco meat. Fresh cilantro and green onions add garden-fresh pops of color. Remember – the best combinations play contrast against each other:
- Creamy: Sour cream, queso blanco
- Crunchy: Pickled veggies, bacon crumbles
- Zesty: Pico de gallo, lime crema
Whether you stick with classic beef or venture into pulled pork territory, let these ingredients guide your creativity. The beauty lies in making each bite uniquely yours!
Step-by-Step Recipe Guide

Transform your kitchen into a crispy potato paradise with our foolproof method. We’ll guide you through each stage – from golden oven magic to savory layers that make mouths water. Let’s turn those freezer staples into something extraordinary!
Baking the Foundation
Preheat your oven to 425°F – the sweet spot between speed and crispiness. Toss frozen spud gems with taco seasoning until evenly coated. Spread them in a single layer on a parchment-lined baking sheet. This ensures maximum crunch without sticking nightmares.
Bake 18-22 minutes, flipping halfway. Go 3-5 minutes beyond package directions for that perfect golden armor. Watch closely – ovens vary! You want audible crunch when pressed, not burnt edges.
Building Flavor Layers
While those bake, heat olive oil in your skillet. Sizzle ground beef with onions and garlic until fragrant. Sprinkle remaining seasoning – we want every bite singing with flavor. Drain excess grease, then let the mixture rest.
Arrange your crispy treasures in a casserole dish or keep them on the baking sheet. Scatter the warm beef blend like confetti, then blanket everything with fresh-shredded cheese. Why shred yourself? Pre-grated cheese contains anti-caking agents that hinder melting.
Return to the oven for 7-10 minutes – just until cheese becomes lava-like. Let cool 2 minutes before adding cool toppings. Now breathe in that glorious aroma – your masterpiece is ready!
Tips and Tricks for the Best Results

Mastering the art of crispy potato bites requires a few kitchen hacks we’ve perfected through countless batches. Whether you’re team oven or air fryer, these pro techniques ensure golden results every time – plus creative twists to make your snack uniquely irresistible.
Oven Techniques vs. Air Fryer Options
For that perfect cheese melt, always preheat your oven – even if using an air fryer for the base. Here’s why:
- Air fryers cook faster (follow package times), but ovens create better bubbling cheese layers
- Cook bacon directly on a parchment-lined sheet alongside your potato bites – saves time and maximizes crispiness
- Shred cheese blocks yourself – pre-shredded varieties often leave clumpy disappointments
Customizing Your Creations
Swap shredded cheese for warm nacho sauce when craving dip-able decadence. Try these combos:
- Ranch drizzle + crispy bacon bits + green onions
- Pickled jalapeños + queso fresco + lime crema
- Pulled pork + BBQ sauce + coleslaw crunch
No baking sheet? Use an oven-safe skillet! Its curved edges keep toppings nestled snugly. Remember – the best versions balance textures: creamy, crunchy, and zesty in every bite.
Nutritional Insights and Storage Suggestions

Let’s talk straight about what’s on your plate – and how to keep it tasting great tomorrow. While our favorite crispy potato bites deliver pure comfort, understanding their nutritional profile helps you enjoy them smartly. We’ll break down the numbers and share storage hacks that preserve flavor.
Caloric Breakdown and Serving Information
One serving typically ranges from 400-600 calories depending on toppings. The higher end comes from generous cheese layers and sour cream dollops. Here’s what you’re getting:
| Nutrient | Higher-Calorie Version | Lighter Version |
|---|---|---|
| Calories | 591 kcal | 394 kcal |
| Fat | 36g (13g saturated) | 26g (9g saturated) |
| Carbs | 42g | 35g |
| Protein | 27g | 22g |
| Vitamins | A, C, Calcium | A, Iron |
While not health food, each serving provides 20% daily calcium and 15% vitamin A – benefits from cheese and toppings. Watch sugar content if using sweet barbecue sauces.
Best Practices for Storing Leftovers
These snacks shine brightest fresh from the oven. If saving leftovers:
Cool completely before refrigerating. Use airtight containers – glass works best. They’ll keep 3 days, but expect softening after 24 hours. The sour cream and cheese hold up better than you’d think!
Reheat at 350°F for 10-12 minutes. Spread pieces in single layer – crowding creates steam. Add fresh herbs after warming to revive brightness. While texture changes, flavor remains satisfying.
Crafting Your Own Loaded Tater Tots
Your kitchen becomes a flavor playground with this dish. We’ve laid the foundation – now let’s build your signature version. Whether you crave smoky BBQ vibes or zesty fiesta energy, these ideas will spark inspiration.
Cheese Adventures Beyond Cheddar
Swap standard shredded cheese for melted queso blanco or spicy pepper jack. Smoked gouda adds campfire richness, while crumbled feta brings salty tang. For dip lovers, warm cheese sauce drizzled over crispy bites creates that irresistible pull-apart effect.
Protein Power Plays
Ground beef gets all the love, but wait till you try taco-seasoned turkey or citrus-marinated shrimp. Carnitas shreds? Yes please! Vegetarians win with seasoned black beans or crispy tofu crumbles. Each protein choice opens new flavor dimensions.
Don’t forget the crunch factor! Toasted corn kernels or pickled red onions add texture contrast. Finish with creamy ranch dressing swirled with chipotle, or bright lime crema. Your creations might just outshine the original – and we’re here for it!
Indulge in the Ultimate Homemade Delight! Discover the joy of crafting your own Flatbread Pizza that’s bursting with flavor and creativity. Whether you’re a culinary novice or a kitchen pro, this delightful recipe will transform your mealtime into a gourmet experience right at home.
Don’t miss out on the secret tips and tricks that will elevate your pizza game to new heights! Read my blog now and unlock the deliciousness waiting for you! Your taste buds will thank you—click to dive into the world of homemade flatbread pizza today! 🍕✨